![]()
Protecting information – wherever it goes – is critical to ensuring trust and meeting compliance requirements. Microsoft Sensitivity Labels allows your organization to classify and protect the information in Office 365 and beyond. I will in this blog post give you a tour of how Sensitivity Labels can be configured to classify and protect your sensitive information. The labels can be published to users for them to manually classify files, you may have a default label for all files, and/or labels can be automatically applied based on content, algorithms, and machine learning. This is how published labels look like for users in PowerPoint, and this is natively integrated with all Microsoft office applications across devices when you leverage Microsoft information governance.

Sensitivity labels can also be applied to SharePoint sites, and new functionality will soon allow files stored on sites to inherit the site classification.
Sensitivity Labels – Introduction
You use Sensitivity Labels to classify and protect information:
-
Classify content without using any protection settings
-
Enforce protection settings such as encryption or watermarks on labeled content.
-
Protect content in Office apps across different platforms and devices
-
Prevent sensitive content from leaving your organization on devices running Windows

Sensitivity Labels across Devices and platforms
Some sensitivity classifications like Public and Internal may not have any protection (or just content marking with footer or header showing the classification), while Confidential information may include automatic encryption and protection. Many of our clients also have sub-labels for more flexibility, e.g:
-
Confidential – no protection
-
Confidential – named users
-
Confidential – Infotecthion staff
-
Confidential – Infotechtion staff and partners
Only the last three will then have encryption and protection. Files classified with “Confidential – named users” will only be accessible for specified users, e.g. person receiving an email. Files classified as “Confidential – Infotechtion staff” will only be accessible for users with an Infotechtion ID, and files classified as “Confidential – Infotechtion staff and partners” will only be accessible for users with an Infotechtion ID and pre-approved domains, e.g. your partners.
Configure Sensitivity Labels
Sensitivity Labels are configured in the Office 365 Security & Compliance Center by your Compliance or Security admins. Under Classification, you can create or edit your Sensitivity Labels. This is where you create your labels, e.g. Public, Company Internal, and Confidential.

Sensitivity Label configuration options
Each label has a name and a description or tool-tip that users will see in the Office 365 applications. This helps users pick the correct label when classifying files.

Sensitivity Label Configuration Options
You may want to enable encryption for your sensitive information to protect it (e.g. for information classified as “confidential”). You can then stop people from sharing it, printing it, etc.

Sensitivity label encryption configuration
You may also choose content marking for all or just some classifications, e.g. information classified as “Public” and “Open” have this showing the in the header or footer, and information classified as “Confidential” has a watermark.

Sensitivity Label Content Marking Options
Deploy Sensitivity Labels
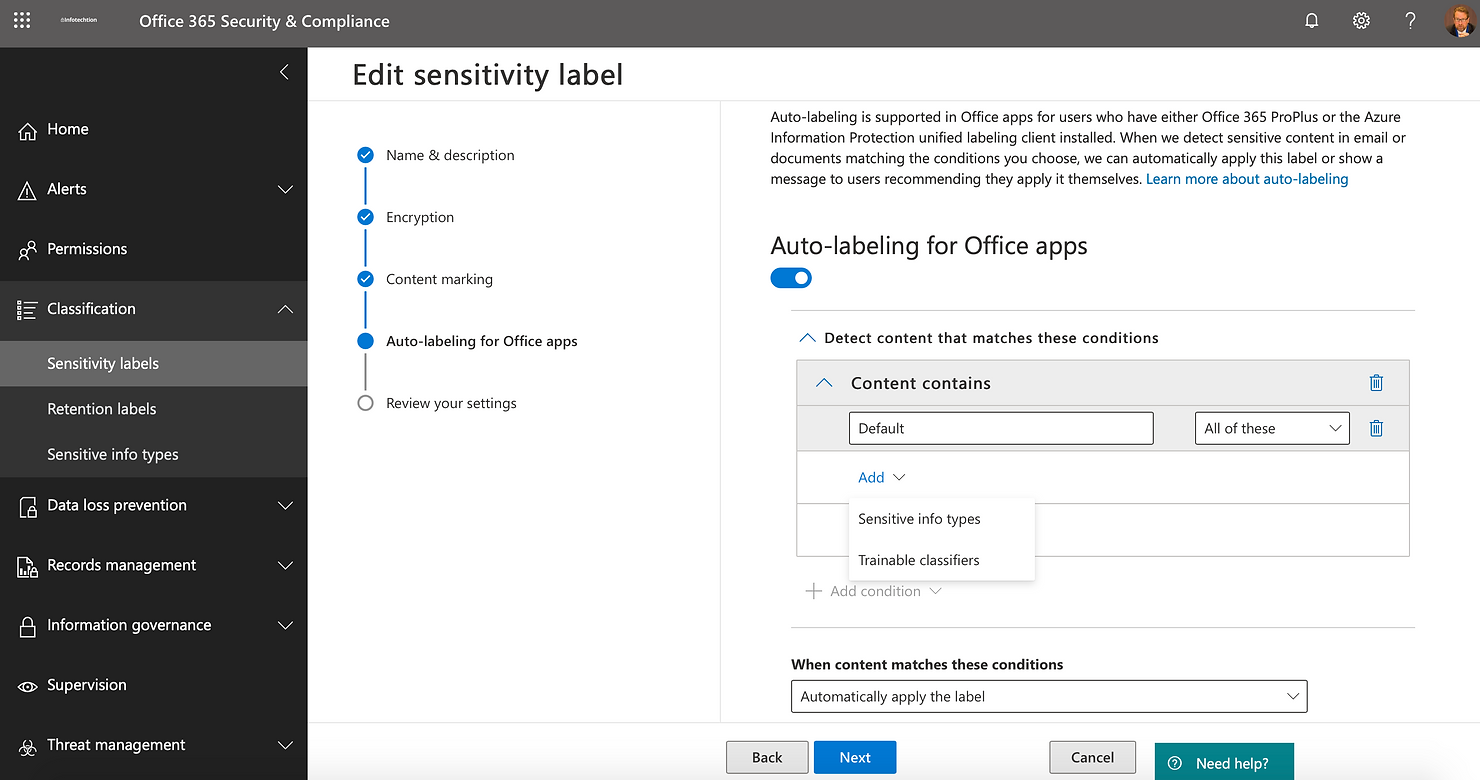
You can auto-apply labels based on Sensitive Information Types and Trainable classifiers.

Sensitivity labels auto labelling
Microsoft Sensitive Information Types comes with a lot of pre-built templates (e.g. US social security number, EU passports), but you can also customize these to identify your unique information. Trainable Classifiers use machine learning to learn how some information looks like (e.g. contract, NDA) based on 50-500 sample files.

Sensitivity labels Sensitive Information Types
Once you have created your sensitivity labels, you can then create a policy for the label. This can be publishing the labels to all or some users to manually classify files, requiring users to always apply a label to classify files, applying a default to documents and email, require users to justify removing or picking a less sensitive classification.

Sensitivity labels deployment policies
Auto-applying Sensitivity Labels
In addition to requiring users to classify information by applying a Sensitivity Label, you can also create auto-apply policies. Microsoft 365 comes with a lot of pre-built templates to help you automate the classification and protection.

Auto labelling Sensitivity labels
Auto-apply policies can be for your entire M365 tenant or only for some high-risk areas. It is also possible to exclude locations.

Sensitivity labels locations
You can define rules for the auto-apply policy, e.g. low or high-volume sensitive content found.

Sensitivity labels rules
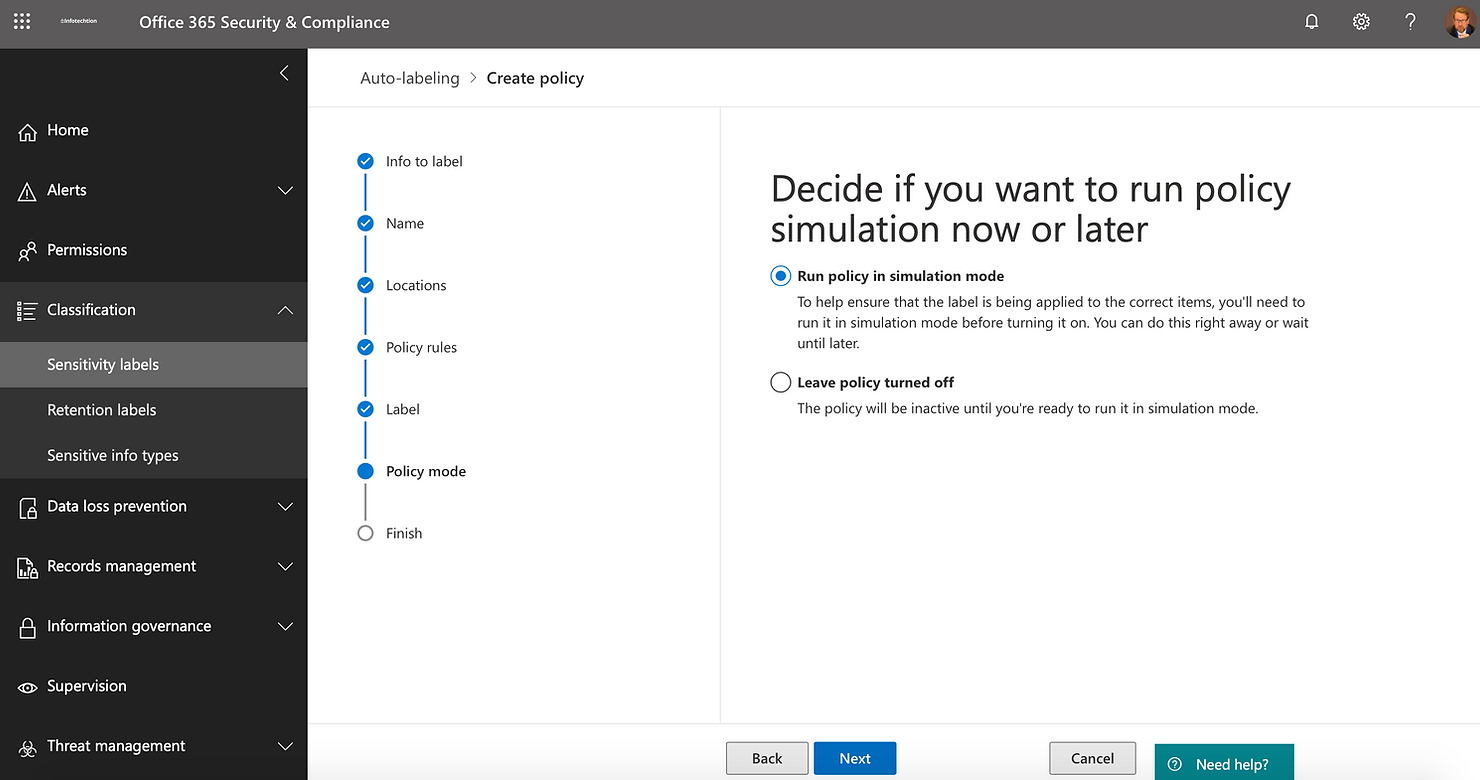
Once you have created the policies, we recommend first running the policy in simulation mode to help ensure that the label is applied to the correct information.

Sensitivity labels simulation
Data Loss Prevention – Introduction
With a data loss prevention (DLP) policy in the Microsoft 365 Compliance Center, you can identify, monitor, and automatically protect sensitive information across Office 365.
-
Identify sensitive information across many locations, such as Exchange Online, SharePoint Online, OneDrive for Business, and Microsoft Team
-
Prevent the accidental sharing of sensitive information
-
Monitor and protect sensitive information in the desktop versions of Excel, PowerPoint, and Word
-
Help users learn how to stay compliant without interrupting their workflow
-
View DLP reports showing content that matches your organization’s DLP policies

Data Loss Prevention interface
A DLP policy helps you protect sensitive information and apply centralized actions when information with a matching sensitive type is identified in the system. In the future, we also expect this to soon include protection based on the sensitivity label (it is already possible for retention labels).

Policy setting includes sending a report fo compliance admins if any information matches the conditions, e.g. sensitive information is shared externally. It can also warn or stop users when trying to share sensitive information with external users.

DLP and Sensitivity labels detection options
Some of the options available with Microsoft information governance:
-
Send incident reports in an email. By default, you and your global admin will automatically receive the email.
-
Choose what to include in the report and who receives it
-
Detect when a specific amount of sensitive information is being shared at one time
-
Detect when content that’s being shared contains: At least instances of the same sensitive info type.
-
Show policy tips to users and send them an email notification. Tips appear to users in their apps (Outlook, OneDrive, SharePoint, and Teams) and help them learn how to use sensitive info responsibly.
-
You can use the default tip or customize it to your liking.
-
Restrict access or encrypt the content
I hope this gave you a better understanding of Microsoft Sensitivity Labels (part of the Office 365 Compliance features) to classify and protect sensitive information. Feel free to contact us if you need help configuring Sensitivity labels and DLP.


